|
Replacing Weather Strip Channel
I am showing you what turned out to be the better way of attaching this channel. When I did the passenger side, I used a different method. I notched the channel to get it to curve around the door channel. To attach it, I used my MIG welder. This worked but it was like using a sledge hammer to do finish carpentry.
The method I show below works much better! It involves using heat to bend the channel which is very thin. To attach it, I brazed it to the door opening.
Preparing the Door Opening

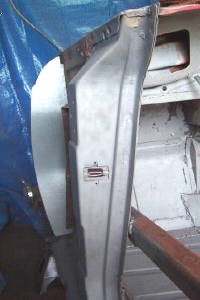
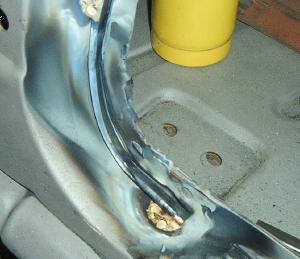
The first step is to remove the old channel and paint. The picture to the right shows what I started with. You can see the old rusty channel and the old paint on the door opening.
Here is a view of the door opening after I sand blasted it. You can see the remaining little pieces of old channel down the side of the doorway. I used my 4-1/2" grinder with a flap disc to remove them. Just about ready for the first piece!
Before I go too much farther I want to explain my technique.
The really big problem I ran into doing the passenger side is trying to get the channel around the little inside curves that make up the doorway.
Before starting on the driver side, I experimented with a piece of channel trying to heat it to form the bends. I used a MAPP gas torch to heat the channel to a dull to medium red. At this temperature, I discovered that the channel wants to bend very easily without deforming the side walls.
The trick that I discovered is to capture the end of the channel first. I did this by "lightly" using a Vise-Grip. It would have been easier if I grabbed one of my neighbors to hold it.
Once the channel is fixed, it was very easy to slowly heat the channel starting a few inches past the first bend you want to start. Moving the torch back towards the bend, I was able to "push" the channel into the curve of the first bend. It was almost like laying a wet rope into the curve. This really was much easier than I thought. 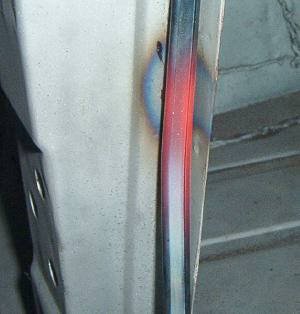
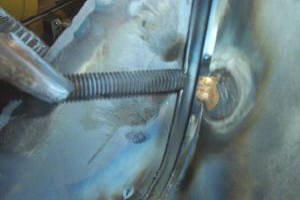
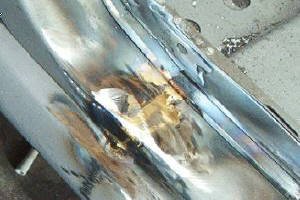
Here is an example of the heat you want to apply to the channel to get it to bend. Notice the side of the channel edge and smooth with no deformation..
Here is the first bend. I used a small screw driver to push the channel down into the first bend. I should have waited until I had some help. One person to apply the heat, and another to push the channel into the bend. Oh well, it will work OK.

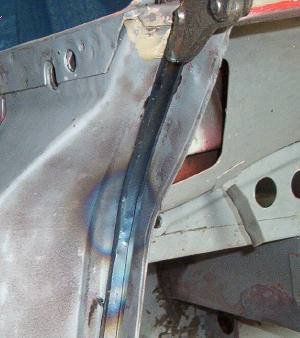
Here is my first braze ever...
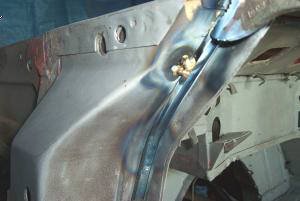
Here is the second braze just above the first curve.
Here is a picture of the last braze on the first piece. Yes, I made sure the next piece would line up with the end of the first piece.
The real key here is to take my time. Also, I should have waited until I had a little help. 
Here is what I have done so far. The front channel is done. I have a piece in place that goes across the bottom of the door opening.
Just have to go up the other side.
Adding the Final Piece
The final piece was a little tricky to set up. The previous piece ended up stopping just short of where the "B" post comes to rest on the sill. I had about 2" of flat sill until the channel has to start up the "B" post. I used the same heating technique to get the channel bent up the back side of the door opening. I found the slower I went, the better the curve looked. I suppose it really isn't too critical to get the channel right up against the door opening but this worked out pretty good.
Here is the final piece being held in place for brazing. I was trying to figure out a way to hold the channel while I brazed it into place.
The picture to the right shows a pretty neat way of holding the track without deforming it. I just used a large bolt to press the channel up against the inside edge of the door frame and held it with a set of Vise-Grips. 
Here is a picture of one of the braze points on the channel. I brazed a connection about every 4 inches which is about the same as the original channel.
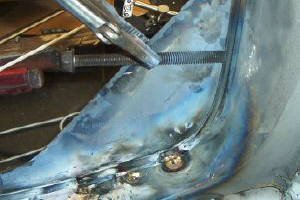
Here is the channel being formed and brazed around the doorway. This view also shows my channel holding technique.
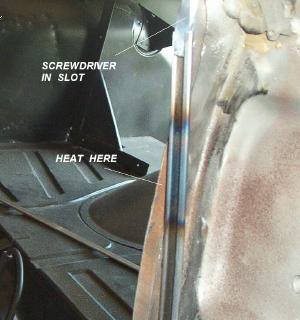
Here is the channel ready for the final bend. I used a large, flat bladed screw driver inserted into the end of the channel to help "lead" the channel into the shape I wanted.
You can also see where I heated the channel to bend it. The channel ended up finishing just below the weld you see to the right of the screw driver. 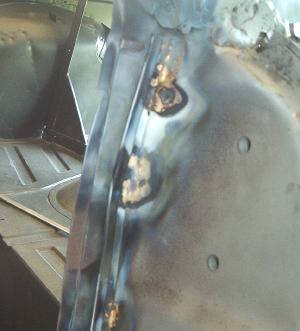
Here is a picture of the last couple of braze connections near the top of the door opening. Just cleanup now and it is almost done.
Since I had the brazing outfit still set up, I decided to fill in some of the gaps on the connection of the "A" post to the sill. This looks pretty good.
This completes my replacement of the door weather strip channels.
To summarize, I think I would definitely forget the MIG welder and braze both sets of channels. |