|
Passenger Side Rear Deck Repair
I have to replace what I am calling the front and rear deck sections on both sides of my TR4A.
The center section has some rust thru but I think I can repair that by welding in repair panels. I started on the passenger side first because it is closer.
A few initial comments before I start:
1. If the outer piece looks bad, you haven't seen anything yet. Wait until you cut away the first piece. 2. Did I tell you need a die grinder of some kind? Good, no go back and pick up another pack of discs. You don't have enough! 3. TAKE YOUR TIME.... This isn't rocket science. Think of it as a rusty puzzle. Most of the work you will be doing will never be seen by anyone but you. If a weld looks bad you can always grind it down. 4. Learn how to plug weld. Pick up a piece of 1/4" copper to put behind your plug weld. It is a great heatsink and a perfect place to start your plug weld. Just drill a hole thru both pieces, put the copper on the side opposite of your welding and draw little circles on the copper backup plate until the hole fills up. 5. Buy yourself a box of 5/16" hex head self tapping sheet metal screws and a magnetic hex driver for your 3/8" drill. Use these to hold your pieces together before you weld them up. 6. Always test fit ALL the pieces before you start welding. Ask me how I know. 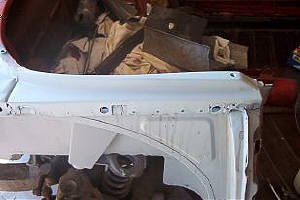
I had already replaced the passenger side front deck extension before I started taking pictures. I will make sure I take pictures of the rest of the work. The driver side is much worse anyway.
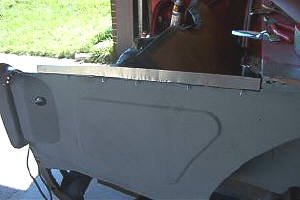
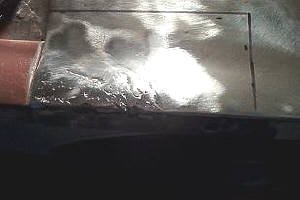
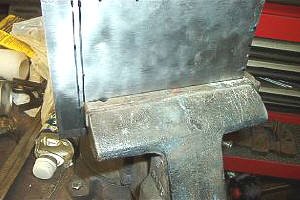
Above is a picture of the new passenger side rear deck extension welded into place. I have to say it fit pretty good. I had heard all the horror stories about panel fit on replacement sheet metal. Notice I even put the captive nut back in the new piece. This was pretty easy actually. I carefully removed the nut from the old piece. It was only tack welded in. The nut has a small shoulder on it which is designed to slip into the hole which brings it up almost flush with the outside surface. I drilled a hole, turned it upside down in the vise, clamped it with vise-grips, and tack welded it on both sides. I have some more sanding and a little hammer and dolly work on the back side.

Here is another view of the front. I had to make it about 3/8" shorter in the front as the replacement piece interfered with the door opening and closing.
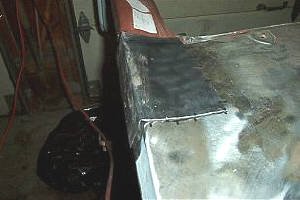
Maybe those stories about panel fit are true after all! I may do a little more grinding and filling here. I am not sure how much is exposed once the fender is installed. Anyway, you get the idea..
Passenger side Rear Deck Extension replacement
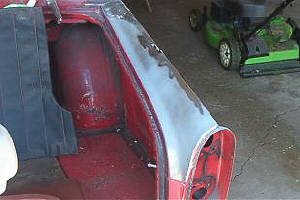
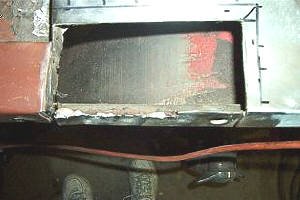
Here is what I started with. There are really two big rust thru areas about half way up the top. This is the better of the two sides! After trying to carefully drill out all the spot welds, I decided it was time for surgery.
The replacement piece is slightly different from the original. You have to consider what is going to support the new piece before you start in.
I stated by dissecting the front first. There are two flanges which are spot welded together in the front. Along with that, the upper right corner of the boot has a flange (lap) type joint. Be careful here as the new piece has it's flange reversed from the original.
I cut a diagonal, creating a 45 degree angle cut up the middle of the boot support and stopped about 1/4" from the mating flange. Then I cut straight across the original seam but behind it through the old piece all the way through to the inner fender. Next I cut down the top edge of the rear deck extension just up to the tail light opening. I drilled out the spot welds down the inside of the tail light pocket. The final cut is across the inner boot edge to the boot opening. 
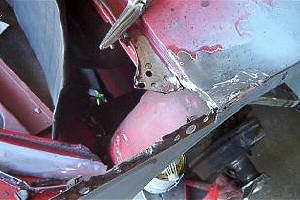
Here is what I ended up with on the front end. You can see a couple of holes from the spot weld cutter on the boot lid support. There was a ton of spot welds here!
You can also see the front flange of the rear deck center section. That nasty strip of metal on the top on the inner fender is what is left of the original. I am planning on replacing the whole strip across the top of the inner fender. 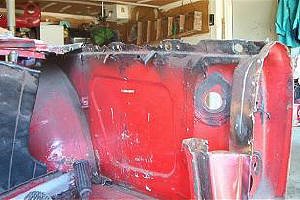
Here is a better view of the flange on the top of the inner fender. By the way, you can pick up a 2' piece of 18 ga. steel sheet from Home Depot.
I found a better place later. Went shopping in the yellow pages for sheet metal fabricators and bought a 3'x4' piece of "paint prep" 20 ga. steel for $10.00. Much Better DEAL!! 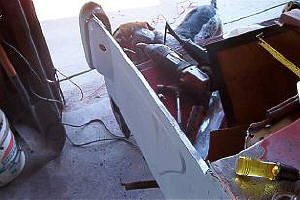
Here is a picture of the rear inner fender with that nasty upper flange cut off. The width on mine was about 1/2" near the center section of the rear deck and tapers off to about !/4" at the tail light pocket. I used my 4-1/2" angle grinder and a flap disc to clean off the top for welding. Nothing but good sheetmetal left!
Here I am installing the new flange. You can see a few of the self tapping screws sticking out the bottom. I still have to add the last little piece near the tail light. Then, I have to weld it up before I can start grinding down the top to fit the new rear deck extension.
I am planning on using a step drill to add the fender mounting holes as they are 1/2". 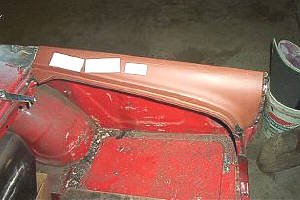
Here is the new passenger side rear deck extension partially installed. I decided to start at the back first. The little inside radius curving away and inward from the bottom of the tail light was off by about !/4"!
Sat down and had a beer, (you do have a refrigerator in the garage don't you!!!) SOLUTION! I started by lining up the edge of the new piece with the tail light socket. That fixed a point of reference that I could persuade (with a Vise-Grip and a small socket) the lips of the inner edges together.
This in turn brought the afor mentioned radius into line with the edge of the rear valence. Now I have a smooth mating of the top of the rear valence, the lip the boot seal goes over, and the inside curve between the boot and the tail light socket.
Now I just have to line up the front edge, which looks good now, and weld it up. I think I might try and locate a spot welder to weld the two flanges together. Then I need to fabricate up a piece to join the upper boot sections together again. Finally, I will spot weld the outer edge of the new piece to my fabricated lip on the top of the inner fender and I almost have one complete side done!
Here is a view of the new piece from the outside. So far so good! When I get it all buttoned up, I will enclude a couple more pictures.
Repairing the passenger side rear deck middle section
The final rear deck repair on the passenger side is the center section. Originally, I had hoped I could fill the rusted holes with weld and grind it down. To the right you can see my results,, not too good.
I had visit from a good body man and he suggested that since I went to the trouble of replacing the front and rear extensions, I should cut out the remaining bad section and be done with it. So, I am going to cut out the bad section and weld in a new piece. I have marked out the section I am going to replace. 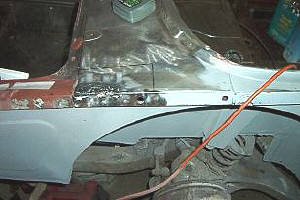
I cleaned the metal back beyond where I am planning on cutting. The black line represents the entire section I am planning on replacing.

The first step was to create a pattern to cut the patch. Here I am scribing a cut on the back side of the cardboard pattern. The short piece will be the rear tab that bends down to attach to the rear deck.
After I cut out the patch panel I added a few reference marks to try and hold some kind of registration between the new and old piece.
Next, I spent a few minutes slowly and carefully trying to form the patch to fit the compound curves of the old piece. This wasn't half as bad as I thought it would be. Just take your time and think about how the piece is going to end up. 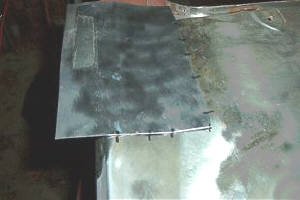
Looking towards the rear of the car. The next step is to form the bend down the side of the inner fender.
Here is my "Hi-Tech" sheet metal brake!
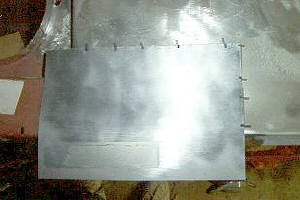
The picture to the right shows the finished patch ready to install. Next, I have to cut the old piece out and form the flange.
Here is a view to the left of the new cutout for the patch panel. The outer black line is the edge of the flange. I am using a hand operated flanging tool. You can see it in my tool section.
If you notice, there is an additional cut I have to make on the upper right hand corner to extend the flange all the way horizontally. 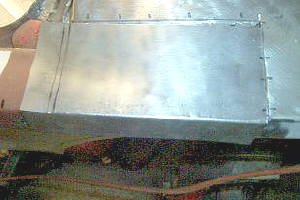
Here is the replacement panel sitting in it's new home. In this view, I still have to bend the rear tab down towards the new rear deck piece. I also have to bend the near tab down against the inner fender.
The flanging tool worked pretty neat.. The new piece tucks in just about even with the existing panel. 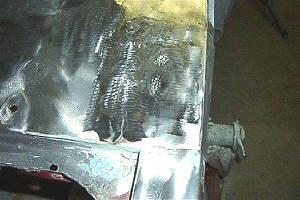
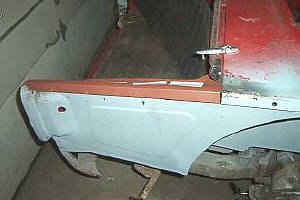
Here is a final view of the repaired center section on the passenger side. Learned a lot on the passenger side. I must have hammered and dollied two sections in the middle to try and bring them up flat when it occured to me that maybe I should try and shrink them. Used my propane torch and it worked great. I did end up using a little bondo to finish it up but it looks really nice now.
|