|
Hood Fit
I thought I would test fit the hood at this point since I was just about done with the major bodywork. Turns out is was a good thing. There had been some accident repair to the right side front but it all looked pretty straight until I mounted the hood.
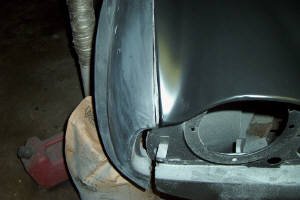
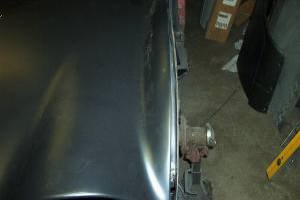
The picture to the right is of the passenger side front. The gap is wider in the front than near the rear of the hood by about half. The fender is just attached with a couple of bolts across the top and none in the front as you can see by the gap at the bottom.
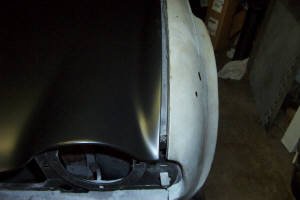
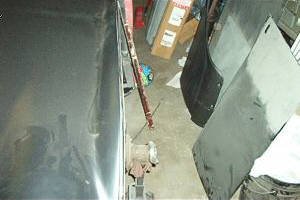
The picture to the left is of the driver side. The gap here is just over 1/2"!!! It appears to be about the same all the way back to the rear of the hood. I thought about offsetting the hood by placing washers behind the hinges but that won't work because the rear lines up good with the cowling.
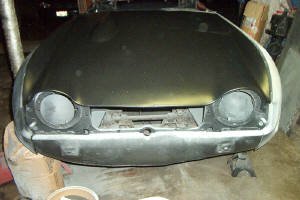
Here is a picture of the front of the car. You can see that the left side is pretty good but the right side is terrible.
If anyone has any ideas, email me.
Here are some measurements I took tonight. I still need to remove the hood and make some diagonal measurements to check how far out the opening is. I am starting to think that the hood is not square to start which will make things interesting.
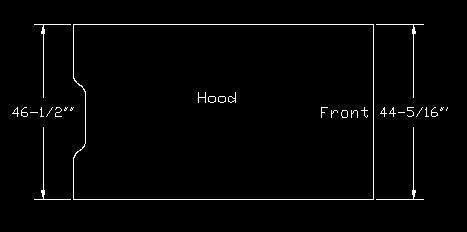
I measured the width of my hood at the front and back. Note that it is narrower in the front. I didn't know that!
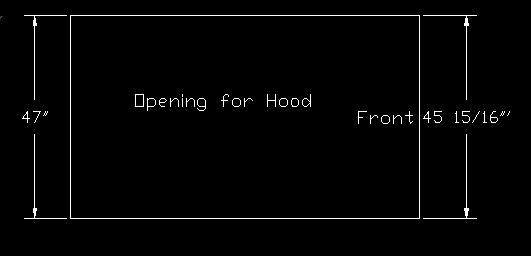
Here are measurements of the inside dimensions of the inner fenders. I have the hood mounted right now so I have to wait until help comes by to assist it removing my hood. Then I plan on doing some diagonal measurements to see if at least the firewall end is square.
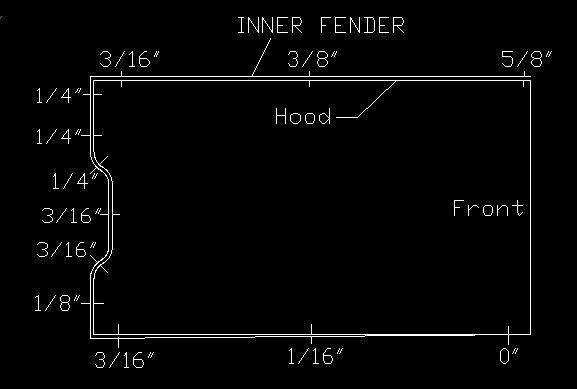
I went around the hood and measured the gap at various places and the results are shown below. Tomorrow I will get the hood off and do some diagonal measurements.
Updated 2/1/04
I recently received an email from a fellow Triumph owner (Bradley Jermyn) who had experienced the same hood problem I had. His Triumph had been hit in the same front corner which pushed everything to the passenger side.
Bradley had a very good suggestion which was to first, remove the front fenders and insert threaded rods across the inner fenders through the fender mounting holes. The rods will hold the two inner fenders parallel with each other. Step two is to remove all 4 bolts holding the front inner fenders. Finally, shove the front driver side inner fender to the left which will give me a even gap along the passenger side of the hood.

After moving the front over about 3/8" the hood looked more "square" along the passenger side and across the front of the cowl.
Next, I decided to see what I could do to even up the position of the two hood hinges in the opening. This proved to be interesting as you can see by the gap of the passenger side hinge to the inner fender and the larger gap on the driver side hinge below. The passenger side is about 1/4" and the driver side is about 5/8". This is a problem!!

At this point, I am really trying to not jump to any conclusions about what is actually wrong here. Some way or another, I have to get the hinges centered up better which will center up the hood too I hope.
I keep coming back to the driver side inner front fender. This is where the front half starting about the top of the wheel well forward has been replaced by the previous owner. I decided to take a look at how perpendicular the inner fenders are to the ground.
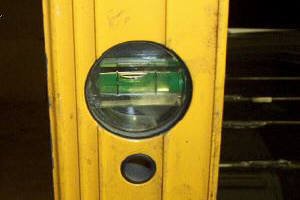
I put my 4" level on the passenger side inner fender and it looked pretty good as you can see to the left.

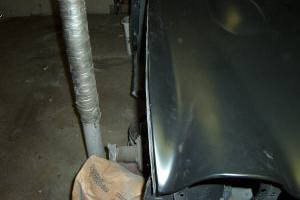
Here is the driver side front inner fender forward of the wheel well. As you can see it is bent out, away from the hinge! I think I am on to something here. I really wish I would have just replaced the inner fender.
The first thing I did was to use a 3 pound adjustment device to move the top of the driver side inner fender in towards the hinge. Also, I used a crow bar to bend the passenger side hinge away from the inner fender to create a larger gap on that side. This also brought the hood more into the center and helped to even up the gap.
It looks like there isn't one single issue that is causing the problem.
Here is the latest on the hood gap on the passenger side. I still have a little more to go, but it is starting to look pretty good.
Here is the driver side. The gap is about half as much as when I started today. A little more fiddling and I should have it.
The point to remember here is that sometimes it is better to replace a $180.00 piece of sheetmetal instead of patching up an already bad repair. I should have more soon but I know I can get it finished from here. I think about another 1/8" would do it. I was wondering for awhile! Next weekend I should hopefully get it finished up. Check back next Sunday night.
I might have to put a couple of washers between the hinge and the fender on this side to get the last 1/8".
3/13/04
OK, maybe I was just a little hasty regarding my repair of the repair... I spent some time down in the garage today (Saturday) looking at my hood problem. One thing I noticed was that the inner fenders still needed a little straightening. I ended up using the back side of my 4" level which was magnetized as well. After spending a half hour or so on them, they look much better.

I looked for anything else that could screw me up on the hood and noticed first that I needed to "rotate" the hood just a little bit to get the leading edge even against the firewall. As I was loosening the bolts on the passenger side hinge I noticed it had kind of a dog leg bend in it. The driver side doesn't look like this!!!
Off it came and I dug out a spare one which was straight. I mounted the straight one on the car and suddenly my hood gap looked much better. The bent one was the one that was on the hood that came with the car. I would think that this hood is a replacement based upon all the other damage but I bet the old hinge was bolted on thinking there was no problem with it.
Here is the passenger side hood gap with the good hinge installed. I still have to do a little adjusting to square the hood in the opening a little better but for now it is looking pretty good. I just want to make sure all the panels fit before I start the final priming and block sanding.

Here is the drive side. MUCH BETTER!!! Now on to getting the doors done. You can see my driver side door skin to the right in this picture.
|