|
Repairing the Driver Side Rear Deck Center Section
After I primed the rear deck I noticed there were a couple of pin holes of rust in the rear deck center section on the driver side. I couldn't believe I missed it!!
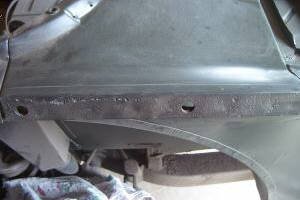
Here is a side view of the bad piece. The edge looks bad but it has been sand blasted and coated with Oxysolv, plus epoxy primer. OH well, off it comes. You can see my scribe line along the deck about 1" from the edge.

Here I have cut along the top using my die cutter. A plasma cutter would have been really nice here. It took about 3 or so 3" cut off wheels to cut along the top and about 2 more to do the front edge. I tried to same some of the vertical section of the inner fender to maintain a point of reference.

At this point I can honestly say that I have removed the last piece of rust from my tub!!!

In this view, I have trimmed up the hole. I also had to add a new bottom (or top depending how you look at it) of the rear fender. I had to add a small strip along the horizontal piece of the inner fender to strengthen it. I also left a little of the rear deck as it meets the two pieces on either side of it just as a reference.

Here is the paper pattern I made for the replacement piece. My plan is to locate the patch just underneath the remaining rear deck on the top, then weld along the bottom of the reinforced upper edge of the inner fender. Then, I can finish the top off using filler.
Ready for the new piece.

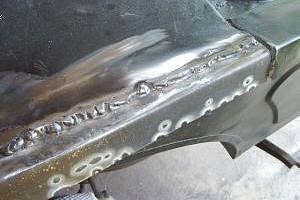
Here I have started running tack welds along the edge. The trick here I have found is to go slow and move around a lot to try and reduce the amount of heat (distortion) created in any one spot.
I have a new piece welded in now. I also used my 4-1/2" grinder and a 120 grit flap disc to smooth out the welds. Just have to drill some holes, spray it with epoxy primer, and add the filler.
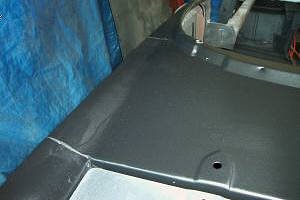
Here is the finished repair. You can just barely see the filler. That will go away with the next coat of primer.
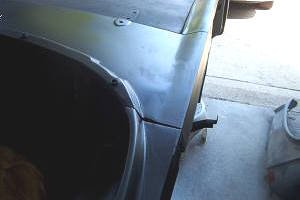
Here is the reverse view of the final repair.
|