|
Inserting the End Caps into the Sill Ends
I decided to make the end cap installation a separate section as it wasn't just a simple matter of pushing them into the ends of the sills and welding them up. I know these parts are made on a die of some kind but you would never know it by looking at any two together. It kind of reminds me of when I was a kid building those balsa wood model planes. You know, the ones that had several sheets of balsa wood with die cut outlines of various pieces. Yes, you just pushed them out of the sheet and started triming them with an X-Acto knife.
Read on and you will see what I mean. 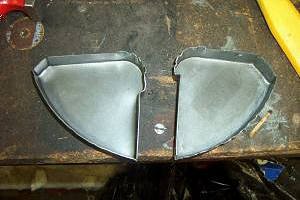
Here is exactly what I mean. If you look at the picture to the right, you will see a set of front and rear caps for one side. There isn't really any one feature that is consistant with either piece except maybe the curve at the bottom.
The middle "knob" is wrong on both pieces. Actually, my sills were flush on that side. This would be the upper, inner section where the two sills meet. The other area that is a problem is the 45 degree angle in the opposite top corner. Not to worry though, that is why we have sheet metal shears. 
Here is a trial fit of the first end cap. You can see first that the 45 degree angle is way too wide compared to the sill. By the way, the weld bead you see at the bottom of the "B" post is a previous repair to replace missing/rusted metal.

The first thing I did was to remove the little "knob" on what would be the inside corner. On my sills, this is a flat surface from the inner to outer sill joint. I removed it by cutting up the outside flange, then using a body hammer and dolly to make the corner a right angle instead of a radius.

Here is a second trial fit after removing the "knob". It is not too far from fitting up pretty well. I used a dolly and body hammer to form the end cap to the sill shape. Once that was done, I removed the end cap to clean up the metal on both the inside of the sill and the outside of the end cap.
I have decided to use my brazing setup instead of the MIG welder. I have found that the MIG welder doesn't do such a good job welding two pieces of metal together in this position which would be welding the "ends" of the pieces.
Brazing is much more compatible with this type of weld as it is almost like soldering where you heat up the two pieces of metal, then place the brazing rod in contact with the hot metal and the rod melts up into the joint. 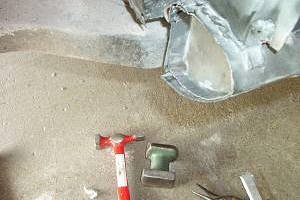
Here is a picture of the end cap fitted into the sill. You can see the hammer and dolly I used to form the end cap into the sill. At this point, I am ready to take it out and clean up everything in preparation for brazing.

Here I have done my first tack braze. Sorry for the lack of focus. To complete the brazing, I am only brazing where the metal is up close to each other. As I get to open areas, I am using the hammer and dolly to marry up the metal as I go.

Here I am working my way up th inside edge.

Here is the completed end cap installation. I have brazed all the way around the sill. I sprayed a coat of epoxy primer over it next. One down 2 more to go. I have to put Waxoyl in the sills but I am waiting until I get the tub painted. My plan is to drill a small hole in each end cap large enough for the nozzle to go thru but small enough to plug with a rubber stopper.
|