|
Driver Side Rear Deck Repair
I have to replace what I am calling the front and rear deck sections on both sides of my TR4A.
The center section has some rust thru but I think I can repair that by welding in repair panels. I started on the passenger side first because it is closer.
Replacing the Driver side rear deck front extension
At this point, I have removed all but the piece shown to the right. It is very easy to save the captive nut in the top of the deck shown to the right. I just cut a little ahead and behind of the nut and drilled out the spot welds at the top of the "B" post.
Make sure you measure the relative position of the captive nut. From what I understand, these captive nuts are used to attach the hard top and surrey top. 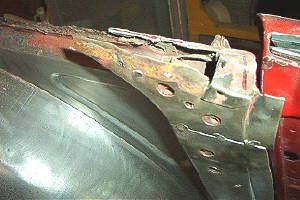
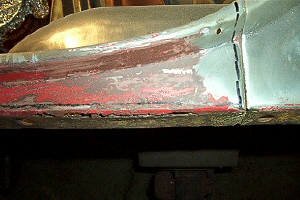
Here I have most of the front of the deck lid removed. Just have to finish up cutting off the very front and the outboard side.
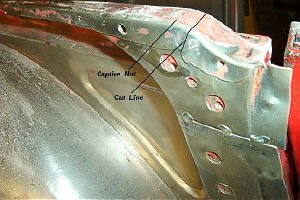
Here is a view where I have marked my first cut line. The vertical cut is just outside of the two flanges that attach the front extension to the center section. I have found that is much easier to "surgically" remove pieces vs. cutting out whole sections. It tends to help preserve reverence points.
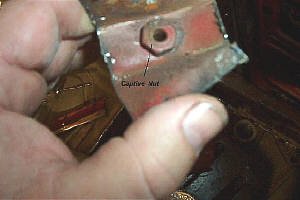
Here is the captive nut. I imagine you could probably locate one if you had to. You could also just use a regular nut I guess. Anyway, just use your die grinder to carefully cut away the old sheet metal and you will be all set.

To start the attachment of the captive nut in the new piece I drilled a 1/4" pilot hole in the approximate location of the nut in the original piece. The location isn't too critical as they are kind of randomly located in production.
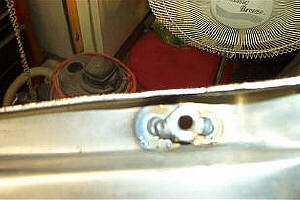
I just finished tack welding the nut from the back.
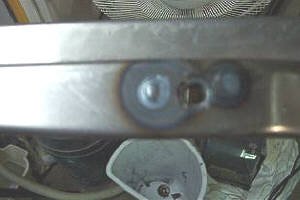
Here is a picture of the installed captive nut from the top. I have to grind down the weld a little bit.
Repairing the driver side tab at the top of the inner fender
Here is a top view of the inner fender where the new front extension will go. Before I can start installing that, I need to replace the tab on the top of the inner fender like I did on the passengers side.
Here I have already cut off the rusted section of the vertical tab on top of the inner fender.
Next, I used my grinder and a flap disc to clean all the paint and sound deadener off the remaining horizontal surface at the top of the inner fender.
I then made a "L" channel 1" high and 3/4" wide at the base. I made this side about 14 1/2" long and it worked out pretty well. I punched about 6 holes in the 3/4" side of the piece, clamped it and plug welded it to the top of the inner fender.
After I got it spot welded in, I ran a continuos weld down the inside and outside seam of the new piece to the old inner fender. A little grinding and it was ready to start fitting the front extension of the rear deck.
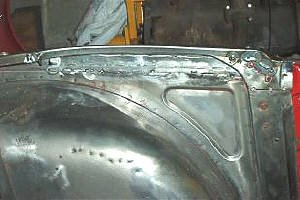
Here is a outer view of the repaired inner fender. Note to self... next time, extend the new lip all the way forward. You can see there is about a !" gap in the front in the front from the lip to the rear of the "B"post.
Here is the new front piece installed looking from the inside. The top of the inner fender looks much better.
Replacing the Rear Section

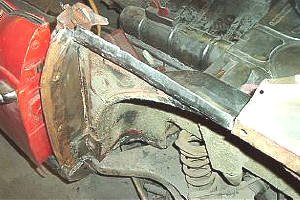
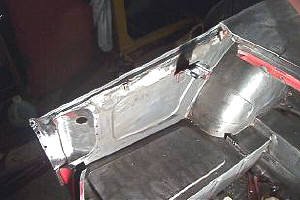
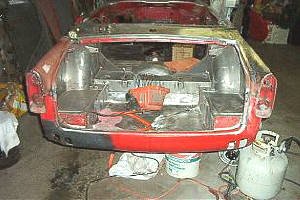
Here is the condition of my driver side rear deck rear extension. Heavy rust all along the fender line. You can't see too clearly from this picture but here is a line of rust running along the top edge just about where the fender would be. This side is connected at the front to the center H-section by a tab. Also, there is a LOT of spot welds across the inside top edge towards the lip that supports the weather strip.

There is a bracket that supports the boot lid support that has to come loose too.
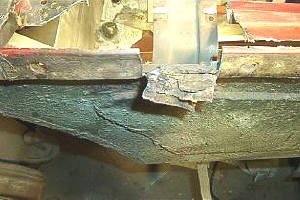
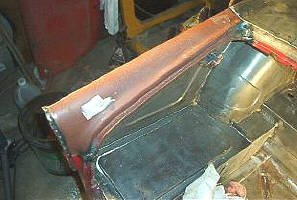
As I had said before, forget about removing the panels in one big piece. You can see in the picture to the right that I have removed about a third of the rear extension. I also cut through the tab on the inner fender to verify the degree of rust.
Moving ahead, I have removed the entire rear extension. Then I cut off the rusted tab from the top of the inner fender and replaced it with a fabricated patch like I did on the passenger side.
Next, I used my grinder to adjust the taper on the new lip using the replacement deck extension as a template. It is just about ready to install the new extension. 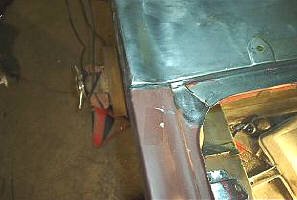
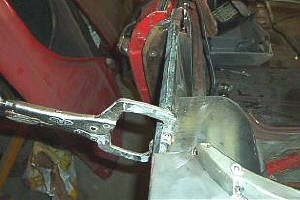
In the picture to the right you can see the test fit of the new extension to the center section. I ended up having to "reform" the front bent tab of the new rear deck piece to get the gap to look right.
One other note.. I ended up not trying to remove the "lapped" bottom portion of the old rear deck piece from the "H-section" There are up to 7 spot welds in a very small area which secure these two pieces together. I must have been lucky on the passenger side. I opted to just cut them flush. 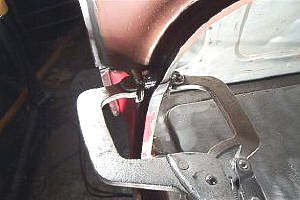
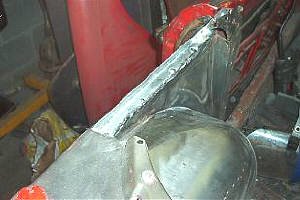
Here is the first step you have to do to weld in the new piece. When you test fit the new piece you will find that the joint from the trunk seal lip to the tail light is about 1/4" off. The other problem is that there is a missing lip on the new piece that mates up with a corresponding lip on the lower valence.. Not a big deal as on both sides of my car there are no welds there anyway
What I did to solve this problem is shown above. I used a big Vise-Grip and a small socket. From the picture you can see that the socket goes into the recess next to the flange that holds the boot weather seal. The socket is pressed into the recess by the Vise-Grip. You basically compress the joint together. This brings all those curves into alignment. After you get it set up right, tack the two pieces together on the exposed flange.
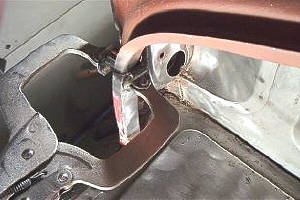
Here is a view from the other side. The object is to get he inboard corner to line up tight. This will draw the inside curve on the other side together. Just tack this for now.
At this point, I have welded up the joint near the trunk lid seal lip along with several spot welds around the tail light opening. Make sure you use a copper backing plate around these welds as you are very close to the edge and it will be very easy to burn through. I used a 1/8th" drill for my pilot holes.
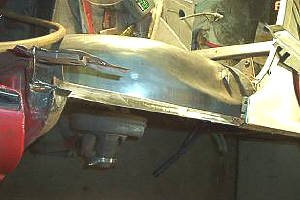
Here is a view from the rear showing the new sheet metal. I still have to strip the lower valence.
|