|
Replacing the Driver Side Floorpan
Replacing the driver side floorpan and sills was about the same as the passenger side. If you would like to see a step by step replacement of the floorpan and sill, check out the passenger side floorpan and sill replacement. This section deals more with repairing the lower firewall.
I did try a little different process this time. Replacing the Sills If you remember on the passenger side, I first tried to insert the sill halves one at a time. Here is the problem with that plan... First you must temporarily lift the body up in order to allow the sill to fit over the edge of the new floorpan. To make the problem even worse, you must keep the top edge of both sills even with each other while supporting the weight of the body. I ended up plug welding the two halves together. This is a strong weld but I would have liked to weld the sills together before they were installed.
On the driver side, I decided to follow a different proceedure. I lined up the two sill edges in my bench vise and welded the two sills together from the inside. I ran a continous bead along the inner seam from one end to the other. Now I have a nice edge running along the top of the sill for the door gasket. I also have a much stronger seam between the two sill halves. After I finished welding the two upper flanges together, I used 5/15" self-tapping screws to hold the bottom flanges together until I got it all squared up.
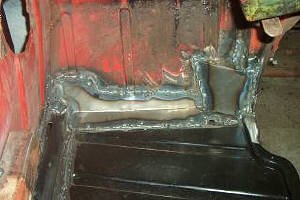
Here is the driver side floorpan and repaired front bulkhead. I had to replace alot around the front bulkhead adn even some around where the transmission tunnel bolts up. I bought a one square foot piece of 20 ga. steel to make patches. I used alot of cardboard templates to get the fit right before I started cutting metal.
You can also see the new inner sill in this picture. Part of the patch also repaired the previous hole above the inner sill. It's all buttoned up nice and tight in the front now.
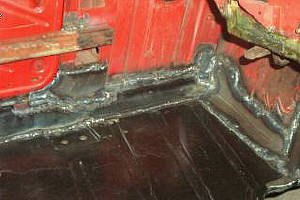
Here is a better picture of the repair I made to the "A" post. You can see some of the previous owners fiberglass repair work to the inside of the battery box. I have a replacement piece that is on the list to replace.
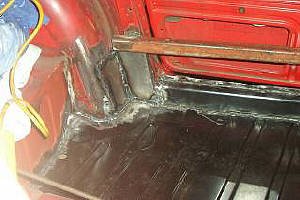
Here to the right is a picture of the "B" post repair. I had to go up pretty far on the post to get to solid metal. It's a good thing I didn't weld the door support any lower! Notice I forgot to drill the seatbelt harness bolt hole!!

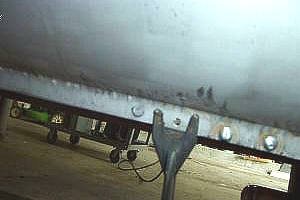
Here is a picture of the rear of the outer sill to "B" post repair. I have welded in a new patch on the left. I still have to make and install the right side patch.
I have a lot to do but I have been trying to set asside at least one day a week for awhile now.
Plug Welding the Sills
In the picture to the right, you can see the self tapping screws I used to temporarily hold the lower flanges of the inner and outer sills together. These screws have a hex head (5/16") which works out great for using a 3/8" drill and a hex driver bit. I found a magnetized one that worked really nice. I inserted them about every 4" or 5".
I have come back through using my plug welding pliers to do the final welding. I am removing every other screw first and plug welding as I go along. After I get to the end, I will start over, removing the remaining screws as I go. Finally, I went back with a 3/16/" drill in-between the plug welds and plug welded them too.
To plug weld them, I held the mig welder just over the top of a hole about 1/4" away once I had attached my plug welding pliers. I pulled the trigger for about 2 seconds. That's it. |