|
Door Disassembly
You are probably wondering why is this guy taking a door apart? Isn't that like trying to take your grandfathers' pocket watch apart? All those levers, springs and washers....
OK, I need to take the doors apart so I can replace the door skins. I also want to sand blast them while they are apart and spray 2 coats of epoxy primer on them.

Here is our starting point. I have to tell you that this is as much for me as for you. The goal is to remove the door latch and handle, the window, and its' up and down mechanism.
This is not intended to represent the best way to do this. I imagine that when I do the driver side door, there may be subtle changes. I have plenty of large and small zip lock bags to store parts in. I also have a good marker that will write on the bags. I have a garbage bag to put the window mechanism in.
Here is the sequence I am going to use to disassemble the door.
1. Remove the door latch rod and handle mechanism. 2. Remove the regulator stop. 3. Remove the track tie rod. 4. Remove the window tracks. 5. Remove the window glass and regulator. 6. Remove the door latch. 7. Remove what's left of the water barrier. 
The first step in removing the door handle mechanism is to remove the small wire clip securing the rod from the handle to the actual latch.
This consists of a wire spring clip and spring washer on the back. What this means my friends, is that when we are done you need to have three little pieces in your hand. 
I just pulled the clip off the rod and you can see the washer in there. I hope this isn't the last time we see it!!

Here is a view of the rear spring washer. This is jumping ahead a little bit as the door latch handle has been removed already for this picture. I just wanted to show you the second spring washer.

Remove the door latch mechanism by unscrewing the 3 screws around the door handle mechanism. I put these in a zip lock bag and the mechanism and rod in a garbage bag.

The last thing to save for the door latch is the small piece of "anti-rattle" material which keeps the door latch rod from bouncing against the inside door panel. I saved this only for reference. I am planning on substituting something once I start assembly of the door. I can't believe that in 40 years there has to be something better than horse hair or whatever is there now.

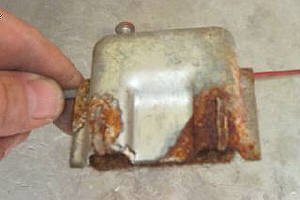
The next part I removed is the regulator stop. This is held on with a 7/16" nut.

Here is the regulator stop bracket. Into a zip lock for now.
Regulator Stop Bracket

Removing the Window Track Tie Rod
Before the window tracks come out I have to remove the tie rod at the bottom of the door. This is supposed to hold the bottom of the window tracks together as the window moves up and down. I just remove the two screws in the center of the tie rod.

When I got the tie rod out, I noticed there is a small piece of felt to cushion the bottom of the window. This will have to be replaced. With what, I have no idea. I am leaning towards some kind of thick felt that would resist abrasion.
Here is a view of the bottom of my passenger door tie rod. What a surprise, there is rust on it. Another job for my trusty sand blaster. I think I will spray this with epoxy primer too. That way it will never rust.
Removing the Window Tracks

Both the front and rear window tracks are each held in with three bolts. Don't forget to put the bolts into bags with the tracks.

Two more bolts at the top and it is free.
The front track comes out the same way. Remember the bolts!!
Removing the Window and Regulator

This is the part that is most difficult to do. What has to happen is that once the 4 window crank bolts come loose, you have to work the window up out of the top of the door enough to get the 2 snap rings loose that connect the glass to the mechanism.
These pieces cannot come out together. The spring clips area a real pain... There is also a leather washer behind the bracket to that you must also save. 
Once you remove the 4 bolts, you have to slid the roller shown to the right out of it's horizontal track. You will probably have to wiggle it around a little bit and maybe even wind the window crank up and down a little bit.

Here is a view of the infamous spring clip! It is probably a good idea to have someone help you here as the washer can either break or launch itself to the darkest part of your garage guaranteed! One is still playing hide and seek in my garage as I write this.
There is also a small leather washer that goes in between the regulator arm and the back of the slot on the regulator. Once these clips are removed, you can separate the door glass from the regulator and remove both from the door. 
Now that the window is out, we can remove the door latch. There are 4 screws which hold the door latch.
Removing the Door Latch
Removing the Water Barrier

The water barrier, or what is left of it is the last thing to come out. This will have to be made from scratch. Save all the little clips you can find. I found several laying in the bottom of the door.
Is should be fairly easy to reproduce as it is a strip of cardboard about 1/8" x 1/4" with plastic rolled around it once and stapled. 
Here is a fuzzy closeup of one of the clips.
That about does it. I originally was going to just sand blast the door and prime it . After I removed the paint, I found quite a few dings and dents. I decided to remove the door skin and replace it with a new one. As a side note. I found quite a bit of rust between the door skin and the frame which would have eventually worked its way to the surface.
|